Sunday, December 22, 2013

Granola Fail

My very own mother has complained not that I haven't been blogging in months but that my posts did not have enough failure. Thanks, Mom. So, fresh from my holiday kitchen I bring you a solid recipe failure: homemade granola.

My dad loves granola so as part of his Christmas present I thought I would make a batch of granola from scratch. I asked the Biggy for a recipe suggestion and she gave me one off of Orangette, but I was thinking I wanted to make a cherry almond vanilla ish granola and that recipe maybe didn't lend itself to those flavors. And it required a trip to Whole Foods for brown rice syrup and I was feeling lazy. (As you will see most likely resulted in the upcoming fail...) So I started searching around and came across a recipe for Almond Crunch Granola:

1 c. slivered almonds, toasted
1 c. flaked coconut
1/2 c. honey
2 1/2 c. rolled oats (I used quick cooking, recipe said any kind would do...)
3/4 t. cinnamon
1/4 vegetable oil

I figured I'd add some vanilla in with the honey and stir in dried cherries after the fact. Blend everything together and bake at 350 for 30 minutes stirring occasionally.

Well, things started rough when I came within 45 seconds of burning the toasted almonds. They were just a bit more brown than golden, but didn't taste burnt so onward I went.  Next, I realized my honey bear had crystallized and I don't have a microwave in this kitchen. (And besides, the last time I microwaved honey I left it in too long, the jar began to melt, I tried to pour the honey out to save it from the plastic and the honey was so hot it began to melt the honey bear I was pouring into...molten honey will burn off your fingerprints. Just sayin.) Learning lessons all the time, I say. So this time I boiled water and made a water bath to melt the honey. Which worked fine except I only had maybe 1/4 cup. Sigh. What to substitute? Dark Karo syrup? Why not. I have no idea if this was a good idea or not, but that's what happened.

With everything finally mixed together (vanilla added as well as some cardamom) I spread it out on the baking sheet and in it went. I set the clock for 15 minutes, stirred everybody up, and put it back in for another 15 minutes. Turns out 10 would have been better. I started smelling it and pulled it out about 3 minutes early. It wasn't blackened. Yet. But it was certainly a nice dark brown. I got mad and went for a run hoping when I came back the granola would be crunched up and not too bad. Needless to say I mixed in the cherries. I poured it into its cute glass jar. I stared at it. I tasted it. I glared at it.

Annnnd this morning I salvaged the cherries and tossed the damn thing. Yep, that's it in my trash can.

So I decided Dad didn't need granola and sat down with my coffee, Real Simple, and Giada's perfect stinkin' Christmas episode on tv. And that is when I absently flipped open my magazine to an applesauce granola recipe! I grumbled at Santa to butt out and got started.

This time around the recipe looked like this:
3 c. old fashioned oats
1 c. chopped raw cashews (I had almonds left so that's what I used)
2/3 c. unsweetened applesauce
1/4 c. sesame seeds (left these out)
1/4 c. packed brown sugar
4 T. melted butter
1 1/2 t. ground ginger
1/2 t. fine salt
1/2 c. chopped dried pineapple (I also added the, ahem, saved cherries)

Mix everybody together, spread on a rimmed baking sheet, bake at 275 for 55-60 minutes tossing twice.

I learned that dried cherries will absolutely not be chopped in a food processor, mini or regular sized. I also learned that this granola is a way better idea. The ginger, pineapple, and cherry make a really nice flavor combo, the lower temp oven meant I was less likely to burn yet another batch...

Chai Spiced Sugar Coins

This holiday season I tested out all new recipes for my cookie baking. That's a bit risky you say, but I prefer to think of it as an amazing idea.

I went with my girl Rachel Ray's "1 dough, 16 cookies" insert from the December magazine to simplify my life and these sugar coins were my favorite of the 4 I tried.

Recipe looks like this:
2 sticks butter (room temp)
1 c. sugar
2 egg yolks
1 t. vanilla
2 c. flour
1/2 t. coarse salt
1 t. cinnamon
1/2 t. cardamom
1/2 t. ground ginger

Cream butter and sugar until fluffy, scrape down the bowl and beat in vanilla and egg yolks until just combined. In medium bowl whisk dry ingredients, then mix into butter mixture.

With this dough, split in half and using parchment paper roll into a log (about 1.5 inch in diameter). I work with playdoh A LOT at work so this is really easy for me, but for those less capable of making a snake, this is how I do it:

Place dough at one end of your parchment paper piece. Roll edge of paper over the dough and using both palms, roll towards the other end. I roll the dough over several times, shaping it, before actually wrapping it in the parchment. When you have the thickness you want, tap the ends of the log on the counter, flattening them, and roll it up tight in the paper. Then it goes in the freezer for an hour.

When the dough is frozen, use a bread knife (certainly a serrated knife) and slice the log into even coins.  Bake on greased or parchment sheet at 350 for 15-20 minutes. If you want, you can sprinkle them with colored sugar before baking.

These cookies aren't super sweet but they have a definite spiced flavor. Really amazing with coffee. And something you could make anytime during the year, not just the holidays. The recipe also makes over 3 dozen so you get a lot for not a lot of effort.

Wednesday, August 28, 2013

Fruity Crumb Cake

Hi Everyone!  I’m alive.  Apparently once again the slacker half of this team.  I have been cooking some but one thing I really liked was a delicious summery cake I happened across.  Lately I’ve been baking more because really, that’s my favorite thing to do.  And then I can take it to work and let other people eat it for me! Too bad summer is almost over but I’m sure there are some spare summer fruits hanging around at home or in the store!

This cake is yummy; it’s a pretty simple buttery cake with some fruit compote in the middle and a crumbly, nutty topping.  It’s also very pretty, mostly because it’s got a lovely layer of fruit tucked in the middle not because I’m good at decorating.   It also reminds me of a muffin in the form of a slice of cake therefor making it a breakfast cake.


Fruits before and after
 
Fruity Crumb Cake
Filling
4 oz. fresh raspberries
4 oz. Fresh cherries pitted
2 medium peaches, peeled and sliced
1 Tablespoon plus 1 teaspoon cornstarch

¼ cup sugar

 
In a saucepan toss the raspberries, cherries and peaches with the cornstarch to coat.  Stir in the sugar and cook over medium until it’s bubbly and thick.  Remove the pan from the heat, mash the fruit a bit and set aside to cool.
Cake
1 egg
½ Cup sour cream
½ Cup milk
1 tsp. vanilla extract

2 ¼ Cup all-purpose flour
¾ Cup sugar
¾ Cup butter cold & diced
1/3 Cup sliced almonds
½ tsp. baking powder
½ tsp. baking soda
1/8 tsp. salt


Coarse sugar for sprinkling on top

Preheat oven to 350 degrees.  Prepare a 10-inch tart or spring form pan.  (I think mine was actually 9 inch if it matters)

Stir together the wet ingredients.  In a separate large bowl combine the flour and sugar.  Cut in the butter like you would a pie dough until it creates a coarse meal. 

Remove ½ cup of this mixture and put it in a small bowl and mix it with the almonds.  Set aside.

With the remaining flour mixture whisk in the baking powder, baking soda, and salt.  Add the wet ingredients to the dry and use quick stirs until just combined (It will be thick but light like a muffin batter).

Spread about 2/3 of the batter in the bottom and about 1 inch up the sides of the prepared pan. Spoon the reserved fruit mixture over the batter, spreading to cover but leaving a ½ inch border from the sides.  Dollop mounds of batter on top of the fruit mixture and then spread together to make a top layer.  It’s ok if there are some gaps – mine didn’t look too pretty.  Sprinkle the crumb topping over it and then sprinkle with coarse sugar.

Place on baking sheet and bake for about 35 minutes until a cake tester comes out clean, the cake pulls away from the edges of the pan, and it’s a nice golden color on top.  Cool for about 15 min and then remove the sides of the pan.
 

Yum!  I should make this again before there aren’t any more peaches.  I imagine this cake would go well with most fruits.  I can’t really think of winter fruit right now but I’m sure there are some you could cook up and throw in there. (Apologies for the formatting and somewhat large pics, this computer and I still do not get along)


Tuesday, July 2, 2013

Easiest side dish EVER

I found the tiniest blurb ever in the June Rachael Ray for a Tomato & Basil bake and I figured that those are two of my most favorite things, so why not? Turns out this is the easiest thing in the world to make and it was amazing!

1 lb cherry tomatoes, halved
2 cloves of garlic
1 T EVOO
1/3 c panko I didn't have panko so I used Italian bread crumbs instead
2 T melted butter
2 T chopped basil

Toss tomatoes, garlic, and EVOO in an 8 inch baking dish. Season with salt and pepper. I used cherry tomatoes and some mini heirloom tomatoes, hence the yellow in there.
Broil, stirring until tomatoes soften, approximately 12 minutes
Stir panko and butter together, sprinkle over the tomatoes and broil for 30 seconds. I stirred the basil in with the Italian breadcrumbs and butter and sprinkled it all over to broil

And that was that. So easy and unbelievably delicious. I had mine with garlic naan and that was all I needed for a nice, summer supper! 
 

Saturday, June 29, 2013

Blueberry Cheesecake Bars

I'm alive! After yet another month of inactivity...I am broadcasting to you live from the new apartment. I managed to get all my kitchen goodies into the smaller space and I added a snazzy kitchen cart named Charlie to the gang. He and Gladys are besties now.

Anywho, since I've been doing nothing but moving, assembling furniture, driving to IKEA, and repairing holes we put in the drywall, I have a stack of recipes that I've been flagging but haven't had the chance to make. I picked one this afternoon to test out: Blueberry Oat Bars. I have renamed them Blueberry Cheesecake Bars because it seems much more fitting.

I got the recipe from the May/June issue of Taste of the South.

1 1/4 c flour (plus 2 T later)
1 c quick cooking oats
1 2/3 c sugar (divided)
3/4 t baking powder
2/3 c salted butter, melted
2 (8 oz) boxes cream cheese
4 large eggs
1 T fresh lemon juice
1/2 t vanilla
2 c fresh blueberries

Preheat oven to 375 and grease 13x9 baking dish

Mix together 1 1/4 c flour, 2/3 c sugar, baking powder, and melted butter. Press out the mixture into the bottom of the dish.  Bake about 15 minutes until the crust begins to brown around the edges. Let cool for 30 minutes. Side note, we don't have a microwave in this place, so I melted butter in the preheating oven.  This took FOREVER. But it worked :)

Reduce oven heat to 325

Beat cream cheese with electric mixer until creamy, add remaining cup of sugar, 2 T flour until blended. Add eggs one at a time until blended, add lemon juice and vanilla. I looked at the recipe wrong before I went shopping and only bought one box of cream cheese. Luckily I had also bought a tub of whipped cream cheese for bagels so I had enough.

Spread blueberries over the cool crust, pour cream cheese mixture over berries. Bake 40 minutes or until knife comes out clean and center feels firm. Let cool for 2 hours, cover, and chill in fridge for 3 hours. I have no patience. Mine cooled maybe an hour before going in the fridge. I cut them after the were chilling for about 2 hours ish and yes I can see how they'd be even better totally cold and firm but they were darn tasty still a touch warm.
I always tend to make really rich chocolate desserts so this was a good alternative, especially when it's so hot outside. (Although I won't complain, my poor biggy is in 120 degree heat!!!) Totally a make again recipe...it would be great for pot lucks too because you could make it the night before and it would be ready to go in the morning.


Thursday, May 16, 2013

Chops, grits, and 'maters

After all this Asian-y experimenting, it was time for some Southern yumminess. Last month's Real Simple had a recipe for pork chops, cheesy grits, and tomatoes so that's what I went for!
I used paprika, salt, and pepper to season up the 'chops and cooked them up in olive oil. Once the meat was out, I added a bunch of halved grape tomatoes, 1/4 c. cider vinegar and 3 T. of brown sugar to the skillet and cooked it until the tomatoes got a bit soft.
I used quick cook grits, added almost 2 cups of white cheddar cheese, salt, and pepper as the 1/2 c. of grits thickened up. I also boiled the first ear of corn of the summer! Here is the final product. Total Southern tastiness. (I will use white cheddar in my grits again, they were slammin')

Porky Potstickers

So the third and final recipe from the three meals one grocery list article is for potstickers. I think they should maybe be called rolls of some kind because potstickers seem to be pouches of sorts but anywho...

This recipe was actually much easier than I expected it to be. I am no longer afraid of wonton wrappers, it's official!
So pork went in first, then the bok choy and garlic. I didn't have crushed red pepper flakes, so I used cayenne and some slightly random seasoning mix I have. I also had no soy sauce so I used Worcestershire sauce instead...
 Mixed this in with the pork and I was ready to roll!
 I followed the directions and wet one edge of the wrapper, then filled it with the mixture and rolled towards the wet edge. (I used my fingers, dipped them in water and then ran them along the edge. Don't know if that's how it should be done, but it worked great!)
Look at them all! They actually held together and looked legit. I was pretty proud!

Into the skillet! The recipe basically said to fry them off in the skillet so I brushed them with oil and I added a little to the pan just in case. I put them seam side down and then flipped when golden.
Final product plus the radish salad. I will admit I was a little skeptical about this concoction but it turns out that cilantro, radish, and lemon juice is pretty tasty. I'm not sure I would make it again, but I am glad I tested it out.  I also need to remember to add salt if I skip the soy sauce again with the potstickers. Overall good meal though!

Monday, May 13, 2013

Taco Night!


Ash seems to be implying we are slackers at blogging.  Fine, I’ll do it.  It is a lazy Sunday meal though, one that I put very little planning in and looked up recipes while enjoying a beer.  It did turn out better than expected!

It all started with my desire for some grilled corn Tyler Florence style.  He calls it Mexican grilled corn, so it’s basically that recipe from Food Network but modified a bit. I was sketched out by this when I first tried it last year, but it is DELICIOUS. It’s grilled corn covered in a mayo based sauce and other delights.  I’m not a big mayo person but all the other flavors combined make it a delight.


I also wanted to grill some kind of limey chicken to make tacos with but was out-voted and we bought a steak to grill.  The recipe calls for flank or skirt steak but all I could find was flat iron.  It seems similar and worked well so, whatever. (You could probably use any meat.)
Taco night ended up being very tasty.  I stuffed the steak in a tortilla, topped with some homemade pico, queso fresco, and grilled onions.  YUM.

Grilled Corn
4 ears of corn in the husk
¼ cup light mayo
½ C low fat sour cream
Juice of a lime
handful of chopped up cilantro
Cotija or other Mexican cheese (I used Queso Fresco)
Chili powder


Mix the mayo, sour cream, lime and cilantro in a bowl.  Soak the corn for about 30 min and then grill until all sides are charred.  Shuck the corn.

While the corn is still warm, slather with the mayo mixture, sprinkle the cheese all over it and dust with chili powder to taste.

Cilantro lime marinade

Juice of 1 Lime
1 Garlic Clove, smashed
Cilantro
1/3 cup Olive Oil
2 teaspoons of Honey
1/2 teaspoon of Cumin
1/2 teaspoon of Ancho-Chili Pepper
1/2 teaspoon Red Pepper Flakes
Kosher Salt and Fresh Black Pepper, to taste

Chop up lime, cilantro, and garlic in a mini food processor.  Add the rest of the ingredients and pulse until well combined. 

Pour marinade over the steak in a plastic bag.  I marinated 30 min at room temp.  I’m sure you could go longer for more flavor in the fridge, but it was plenty tasty.

Grill approx. 3 or 4 min a side.  Ours was done a little under medium. 


Asian "Lasagna"

Jo Anna was very uncomfortable with this concept, but I can't think of a more clever name, so, quotes it is.

So, Asian Lasagna from Rachael Ray. I started by prepping all the ingredients so I chop chopped bok choy, shredded cheese, warmed up some milk, and threw an onion in the food processor.
Now, I have never worked with bok choy, but it was essentially celery stalks with lettuce leaves on top, so that was easy enough.
 
Once everything was prepped, I started with the butter and flour in the pan, whisking til it was pretty thick. Then I added the milk. (I did actually use whole milk...a lot of times I'll just use my skim, but I thought for a cream sauce in a potentially sketchy dish I'd better buy a baby whole milk) Here I am whisking and whisking until it boiled and got thick. Then off the heat, in with the cheese, salt, and pepper.

New pan, in goes a smidge of butter and the ground pork. Browned that up and set it aside.
 After I pulled the meat out I added the onion and bok choy stems and cooked them until they were soft. Then in went the leaves, the pork, and some lemon zest. I cooked this down just a bit and then came the interesting part.
 Turns out wonton wrappers are super easy to work with. Naturally I do not have an 8x8 baking dish (thought a brownie pan would be weird...) so I went for the oval. Did not have a ton of trouble making the wrappers fit, as you can see. I layered in sauce, wrappers, meat, repeat. (The recipe says to dip them in warm water before you layer, and that made a lot of sense, giving them the texture you would assume these things should have)

 There she is before the oven...
 And after.
So this dish was really pretty yummy. The wonton wrappers are way less fatty than lasagna noodles, although I am sure we made up for that in the cream sauce...but still, that's always nice. The only thing I would change next round would be less bok choy leaves. I don't like greens and these were a little too healthy tasting for me :) The stems were delicious with the onions, though, and the cheese sauce was awesome.
Most excellent day two of summer blogging if I do say so myself!

Sunday, May 12, 2013

BBQ Sammies (But not real BBQ, let's be honest)

This seemed easier than retyping. Thanks to Rachael Ray!


Well as I was prepping my ingredients I had a most wonderful Aha! moment. I am openly admitting this is a dumbass realization, BUT....I finally learned how to use the slicer disk of my food processor!! (Turns out you need to take the other blade out so your slices don't get minced...who knew?) But check out those thinly sliced radishes in that bowl!


Pork, BBQ sauce (I used Jack Daniels Original No. 7), salt, pepper mashed together and rolled into meatballs...
Then I brushed the tops with some BBQ sauce and popped them in the 450 degree oven for 10 minutes. Then I flipped them, brushed more sauce, and back in for another 12 minutes.

I got yummy Challah rolls toasted up and coated with some mayo, layered on the radishes, some jalapenos, meatballs, cilantro, and just a smidge more BBQ sauce.


And oh man was it DELICIOUS! This was a serious homerun for me with the fresh cilantro and the radishes. I can't wait to take deconstructed versions to school for lunch a couple days this week!


Summer tiiiime and the bloggin's easy!

After an incredibly stressful spring (not sure what Jo Anna's excuse is...) my classes are done for the summer and I am ready to blog!

I will also be moving to a slightly smaller kitchen in a few weeks so tales of the tiniest workspace ever shall be posted. (I think I am going to buy an island that can roll and serve as a sideboard/extra storage and counter space between my dining nook and kitchen...thoughts?)

This week I am taking on Rachael Ray's One Grocery List, 3 Meals menu plus an extra dish from Real Simple.

Here's the plan:

Sunday: Smokey Pork BBQ sandwiches (Hoping to take leftovers for lunches...)
Monday: Asian Lasagna
Wednesday: Potstickers with radish salad
Thursday: Pork chops with cheesy grits and jammy tomatoes and corn on the cob

Never worked with wonton wrappers or bok choy before so this shall be an adventure!!

Thursday, February 28, 2013

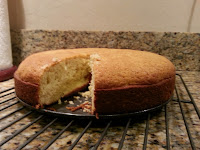
Awesome Day Cake!


It was a good day at work today…but then the traffic happened.  I’m not good with traffic, it turns my good days into cranky pants ones.  By the time I stopped at Target for some things and picked up a gift and made it home I was not so happy.  But a few kisses from my puppy and a glass of wine I was on my way to repair!

Another thing that makes me happy is baking things.  I wanted something simple, mostly because I don’t have a lot in the pantry/fridge right now and I wanted to make sure I’d get to eat it tonight! I remembered a cake I read about on the blog Orangette that I always wanted to try and haven’t.  I made it pretty much exactly as the recipe says and boy did it improve my mood. 
It was simple and delicious.  I drank it with a glass of milk and life was good.  My mother would probably need some whipped cream and fruit or something, the flavor’s not like WHOA but more small and satisfying.

One of the best things about it is that the top gets kind of golden and crusty so you cut off a piece and the middle is all moist and delicious and the top has a bit of a sugary crunch! 

Orangette got it from a recipe called the Busy Day Cake by Edna Lewis.  It’s basically a vanilla nutmeg cake.  The nutmeg is more of a scent, very light but definitely there.


yum
Vanilla-nutmeg cake (or Busy Day Cake)

1 stick (8 Tbsp.) unsalted butter, at room temperature
1 1/3 cups granulated sugar
3 large eggs
2 tsp. vanilla extract
2 cups unbleached all-purpose flour
2 ½ tsp.  baking powder
¼ tsp. salt
1 good pinch freshly grated nutmeg, or more

½ cup 2% milk

Prepare a spring form pan and pre-heat oven to 375
Cream the butter and sugar.  Add the eggs one at a time and mix well after each one then add in the vanilla and mix.
In a separate bowl, mix together the flour, sugar, baking powder, salt and nutmeg.

Starting with the flour add 1/3 of it to the butter mixture and combine, then add 1/3 of the milk alternating until you end with the flour mixture.  Mix until just combined and pour into the prepared pan.
Bake 35-40 minutes until done.  Cool for a few minutes and run a knife around the pan, release the spring form and cool on a baking rack.

I had a piece warm and it was delicious!  I also had to cook it a lot longer than the original recipe calls for, almost 45 minutes, so I guess it just depends on your oven. 
On the Orangette blog she talks about creaming butter with a mixer versus by hand.  I mix almost everything by hand even though I have a stand and a hand mixer.  I think it’s what I find most satisfying about baking almost as much as eating the finished product.  I can’t say for sure but I think you can taste that little bit of extra love.


This phone does not have a good camera, it tastes better than it looks!
 

Sunday, February 24, 2013

Super Bowl Snacks 3: Garlic Bread Bowl with Spicy Pizza Dip

Ok, last Super Bowl snack, I promise. My girl Rachael Ray had this recipe in her January magazine and everyone agreed it was going to be a great decision.

Garlic Bread Bowl with Spicy Pizza Dip

Ingredients
1 large round loaf soft italian bread
3 T. EVOO
2 large cloves garlic, 1 halved
1/2 c. chopped onion
10 oz. hot italian sausage
1 jar (16 oz.) pizza sauce
4 oz. fresh mozzarella
1 T. freshly grated parmesean
1 T. fresh oregano I used basil instead

Directions:
Preheat to 400 with a rack in the middle of the oven. Cut the center out of the bread and hollow it out so it forms a bread bowl.
2. Make the bread you pulled out into rectangle-ish dippers. Spread onto a baking pan and drizzle with EVOO; toss. Place the bread bowl on the baking sheet as well. Bake until the inside of the bowl is toasty (about 5 min)
3. Rub the cut halves of garlic on the inside of the bread bowl. Toss the dippers again with EVOO and bake them again for 5 minutes. Increase heat to 450.
4. Heat dutch oven over medium heat and add remaining tablespoon of EVOO. I used a cast-iron skillet here (the 10 incher) and it worked great
Add onions and cook, stirring, for 5 minutes. Chop remaining garlic clove and add.
Add sausage, breaking it into chunks until it begins to brown, about 5 minutes. The sausage I bought was cased so I cut that off and squeezed approximately 10 oz in the pan.
Add pizza sauce. Cook until heated through, about 5 minutes.
5. Return the bread bowl to your baking sheet. Ladle in the sauce and top with cheeses. Bake until cheese is brown, about 10 minutes. Top with oregano. I have basil growing through the roof so instead of oregano I chopped basil into the sauce and also to go on top.
This dip was SUPER yummy but we really needed a lot more dippers. We were tearing the bowl apart to use, of course, but it would have been better to have some more pieces to start out with.
 
And thus concludes my part of our Super Bowl feast!

Super Bowl Snacks 2.5: Eli's Baked Wings

Feeling super confident about our first round of fried wings we headed into round 2 a few hours later: the baked hot wing! We used Alton Brown's method of steaming and then baking. We bought a little steamer basket which was actually lots of fun and we just followed directions to a t.

Original Buffalo Hot Sauce:

Ingredients:
2/3 cup Frank’s Louisiana hot sauce
1 stick (1/2 cup) cold unsalted butter
1 1/2 tablespoons white vinegar
1/4 teaspoon Worcestershire sauce
1/2 teaspoon Tabasco sauce or other hot sauce (Sriracha is awesome) Pretty sure he used Sriracha...
1/4 teaspoon cayenne pepper
1/8 teaspoon garlic powder
salt to taste

Directions

Place a 6-quart saucepan with a steamer basket and 1-inch of water in the bottom, over high heat, cover and bring to a boil.

Remove the tips of the wings and discard or save for making stock. Using kitchen shears, or a knife, separate the wings at the joint.
Place the wings into the steamer basket, cover, reduce the heat to medium and steam for 10 minutes. Remove the wings from the basket and carefully pat dry.
Lay the wings out on a cooling rack set in a half sheet pan lined with paper towels and place in the refrigerator for 1 hour.

Preheat the oven to 425 degrees F.

Replace the paper towels with parchment paper. Roast on the middle rack of the oven for 20 minutes. Turn the wings over and cook another 20 minutes or until meat is cooked through and the skin is golden brown.

Even though there were a lot of steps, these wings were easy to do. They were super tender and the sauce wasn't overly hot.

 I don't think we had a winner between the fried and baked wing. Frying took less time, but the baked are probably healthier?  I would do both again, and once you master the cooking technique you can try whatever sauces you can dream of which is always lots of fun! 

Super Bowl Snacks 2: Eli's Fried Wings.

Elliot decided he was going to contribute wings to the party. I declared myself supervisor and we got to work!
After some serious research team, we decided to try a baked wing and a fried wing. (The only other time I've ever tried to fry I almost burnt the house down with okra. This time I was going to do it right!)
My Taste of the South had a cast-iron fried honey-lime wing recipe in the January issue so we decided to use that and then we used Alton Brown's baked wing method with the original Buffalo hot sauce recipe.

Honey Lime Sauce
1/2 c. honey
3 T. fresh lime juice
2 t. hot sauce (we used Frank's Red Hot and it was more like 4 t.)
1 t. kosher salt

1 dozen wings
6-8 c. canola oil
1/2 t. black pepper

1. Combine honey, lime juice, hot sauce, 1/8 t. salt
2. Prepare wings (Elliot had to man up and learn how to separate and de-tip wings. I was so proud of him! ...and not about to do it myself :) )
 3. In a deep cast-iron skillet (I used my 12 incher) fill half way with oil, heat to 350.  Add wings and turn occasionally, frying 10-15 minutes until golden brown. Let's notice I bought a nice thermometer to safely fry this go round. I also learned when you drop meat in you lose a lot of heat fast, so it took some trial and error to keep a gas flame where it needs to be for 13 minutes.
4. Remove wings, drain on paper towel, sprinkle with salt and pepper, dunk in the honey glaze And hello, success!!!!

These wings were really flavorful especially for someone who doesn't love super hot sauce. And I am no longer afraid to fry! Hoorray cast-iron skillets and thermometers! 

Super Bowl Snacks 1: Feta Bruschetta

This year our house hosted the Caps/Pens game slash Super Bowl viewing so I had an entire afternoon of grazing to prepare for. There weren't too many of us so we decided to do half portions of most of the recipes.
The weekend before I had crashed at a friend's house and on Saturday morning I made everybody watch Barefoot Contessa while we were lazing around. She made a tomato feta crostini that everyone agreed looked awesome so that became the first course for the afternoons. This was the original recipe, but I modified it a smidge.

Makes 20 to 25 crostini; serves 6 to 8Ingredients
  • 6 ounces good feta cheese, crumbled I used 4 oz regular feta and 2 oz sun dried tomato and herb feta because that is what I had
  • 2 ounces cream cheese, at room temperature
  • ⅔ cup good olive oil, divided
  • 2 Tbsp. freshly squeezed lemon juice
  • Kosher salt
  • Freshly ground black pepper
  • 2 Tbsp. pine nuts I omitted these because I really don't dig pine nuts
  • 2 Tbsp. minced shallots (2 shallots)
  • 2 tsp. minced garlic (2 cloves)
  • 2 Tbsp. good red wine vinegar
  • 2 pounds ripe heirloom tomatoes, ½"-diced I have friends that are weird about tomatoes (read: Annie will only eat cherry tomatoes) so I used cherry tomatoes!
  • 3 Tbsp. julienned fresh basil leaves, plus extra for serving
  • 20 to 25 (½"-thick) diagonal baguette slices, toasted
Directions
Place feta and cream cheese in the bowl of a food processor fitted with a steel blade. Pulse until cheeses are mixed. Add ⅓ cup olive oil, lemon juice, ½ tsp. salt, and ¼ tsp. pepper and process until smooth. Refrigerate until ready to serve.


For the tomato topping, up to an hour before serving, combine shallots, garlic, and vinegar in a medium bowl. Set aside 5 minutes to allow shallots to absorb vinegar. Whisk in remaining ⅓ cup olive oil, 1 tsp. salt, and ½ tsp. pepper. Add tomatoes, stir gently, and set aside 10 minutes. Stir in basil and taste for seasoning.


To assemble crostini, spread each baguette slice with a generous amount of whipped feta. With a slotted spoon, place tomatoes on top. Put crostini on plates and scatter with the reserved toasted pine nuts. Sprinkle with basil and serve.

*****************************************

This was really easy to make and were very tasty. I renamed it Feta Bruschetta because it sounded more fun. The only thing I would change is the amount of lemon juice. I personally found it a little too much...